6-Point Curvilinear Perspective
Best Viewed on Desktop
If you experience any glitches please refresh the page
How to Use the Grid:
To rotate the viewpoint simply click and drag anywhere on the screen. You will see exactly how much you are rotating by looking at the Horizontal and Vertical degrees of rotation at the top of the screen.
To change the field of view of the projection drag the slider at the top of the screen.
The viewport frame can be turned on and off and switched between a 16:9 or 2.35:1 aspect ratio with the tools on the left. A letterbox can also be turned on to highlight only the picture frame and darken the surrounding area.
CUBE/Cube Fill: These buttons toggle the visibility of the cube on and off as well as its color.
GRID/Extra Lines: Toggles the visibility of the scale grid that is made up of accurate squares as well as the extra lines that exist outside the grid and are not to scale.
VERTICALS: Toggles the visibility of the vertical grid lines.
HORIZONTALS: To be used as an alternative to the grid if you want to remove the clutter and fill the frame with horizontal lines.
GROUND: Toggles the opacity of the ground plane making it easier to determine if you are looking up or down.
Other Options Explained:
Axis and 90º Ring: Toggles the visibility of the central x and y axes as well as the circle representing a 180º FOV.
Vertical VPs: The vanishing points that are directly above (Zenith) and below us (Nadir) as well as the two vanishing points that determine the location of the horizon line.
Horizontal VPs: The Vanishing points A,B,C and D that represent the points in front, behind and to each side of us on the horizon line.
Vertical 45º Circle: These circles show the points on the ground and the sky that you would be looking directly at if you were to tilt your head up or down by 45º. The point at which they intersect the vertical lines that pass though the horizontal vanishing points can be used to draw curves that will help accurately construct cubes and squares in perspective.
Horizontal 45º VPs: These vanishing points, shown as small purple points on the horizon line, are the vanishing points that are at a 45º angle to our main horizontal vanishing points.
Rotate View/Drag: This toggles between the ability to rotate the viewpoint and being able to drag the viewpoint itself around. This functionality is only available on geogebra.org.
An introduction to Curvilinear/Circular Perspective
6-point perspective, grid, 5-point, projection
The first law of perspective is that when things get further away from us they get smaller. We all understand this because we experience it every second of every day. In fact perspective is central to so many impactful and emotional moments of our lives. The anger as the train you were 10 seconds late for gets smaller and smaller as it leaves the station, the bittersweet moments of watching your child walk off to college or the terrifying last image of a baseball flying straight at you before you wake up in the hospital. Yet you might be surprised to hear that linear perspective, the method artists and designers have used to emulate this effect for hundreds of years, has never successfully accomplished this.
Say we want to create a drawing looking down the length of a very long wall. A perfect opportunity for linear perspective to show its worth! The wall starts on the left side of the frame and as we look across to the parts of the wall that are further and further away from us we see that it appears to get smaller and smaller until as we reach the horizon and the wall extends to infinity its height and width become so incredibly small that it vanishes, into a single imperceptible dot that we call a vanishing point. It's wonderful, it follows the rule exactly, linear perspective has done it again!
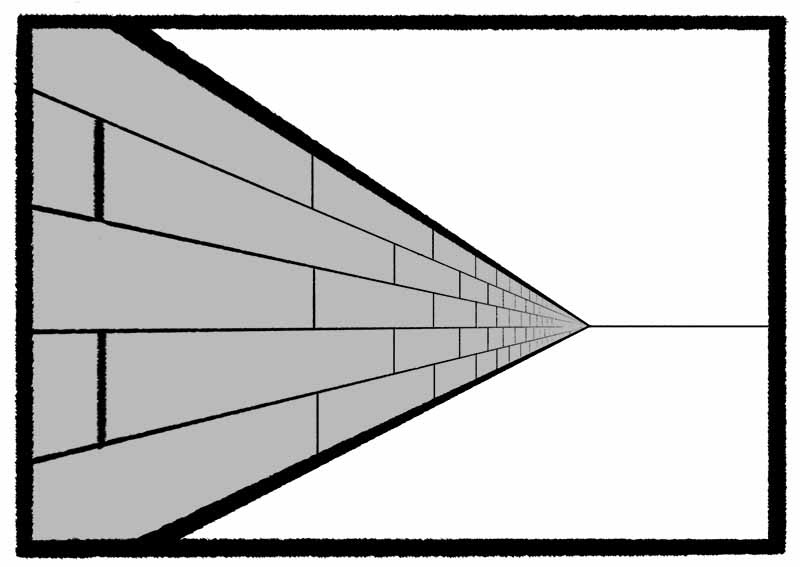
The wall heading to a vanishing point on the horizon line.
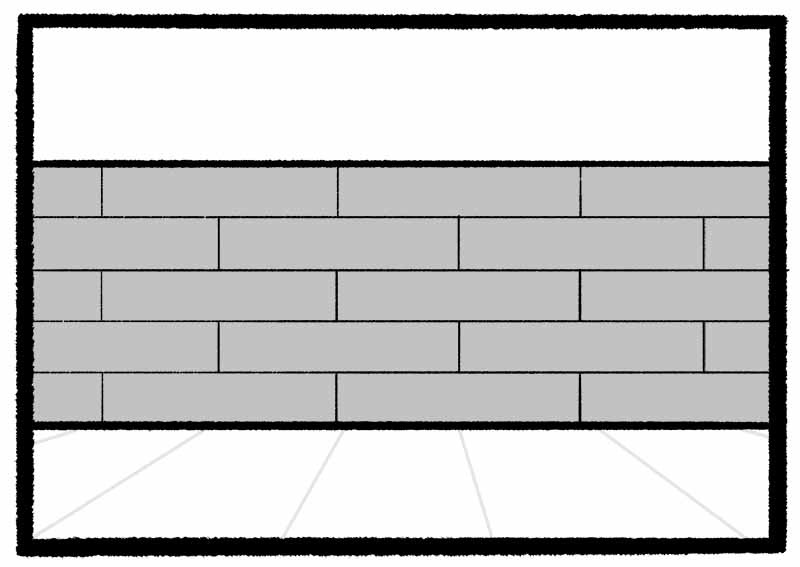
The same wall when looked at directly.
But how about we take a few steps back from the wall and look at it directly. In linear perspective this would be drawn as two horizontal lines representing the top and bottom of the wall. It's the same size across the whole frame. No diminishment. Seems fine. But if we look down on the situation from above we will see that our distance from the wall is not consistent across its length. We are very close to the wall right in front of us but as we look left and right we find that our distance from the wall gets greater and greater. The first rule of perspective says that objects that are further from us should appear smaller and yet this wall isn't diminishing at all. What's going on? Shouldn’t linear perspective be able to follow the number one rule?
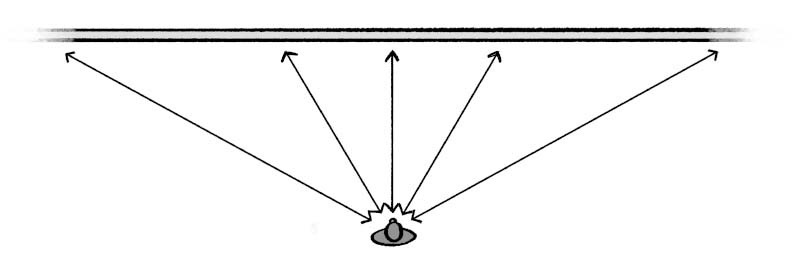
Every part of the wall is a different distance from us, the viewer.
It should, but this is the great failing of linear perspective. In linear perspective everything that is straight in the real world will be depicted as a straight line in perspective and its orientation will be based on a single simple vanishing point. This is great if what you are drawing only diminishes in one direction as in our first wall example but when an object needs to diminish in two directions straight lines start to struggle…
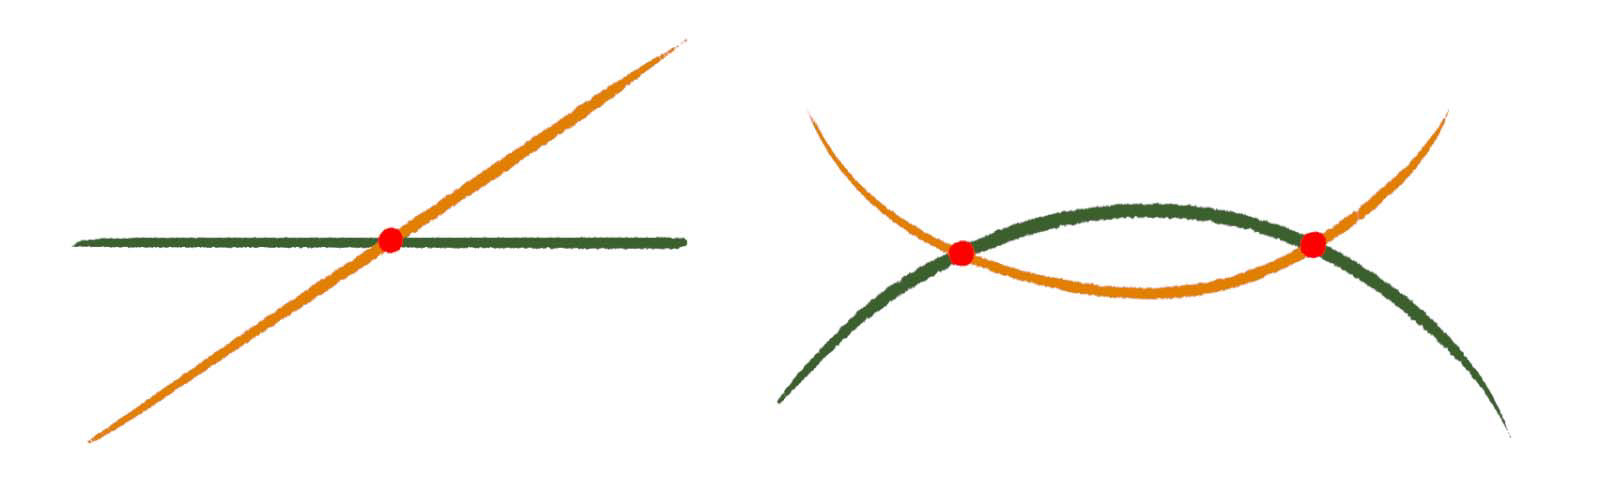
Where lines intersect we get vanishing points. Straight lines only give us one but circles intersect at two points.
That's where Circular Perspective comes in. In Circular Perspective straight lines in the real world are drawn as circles and they don't have just one vanishing point but two, one for where the wall gets infinitely far away from you to your right and one for where it gets infinitely far away from you to your left. This is because straight lines can only intersect with each other once, creating a singular vanishing point but circles can intersect with each other twice! Having two vanishing points allows lines to bend and curve to different extents and even go straight (if the circle becomes infinitely large). In fact, the use of circles makes circular perspective capable of producing some quite extreme fisheye effects as well as much more subtle curvature that closely emulates the distortion caused by lenses in photography and film.
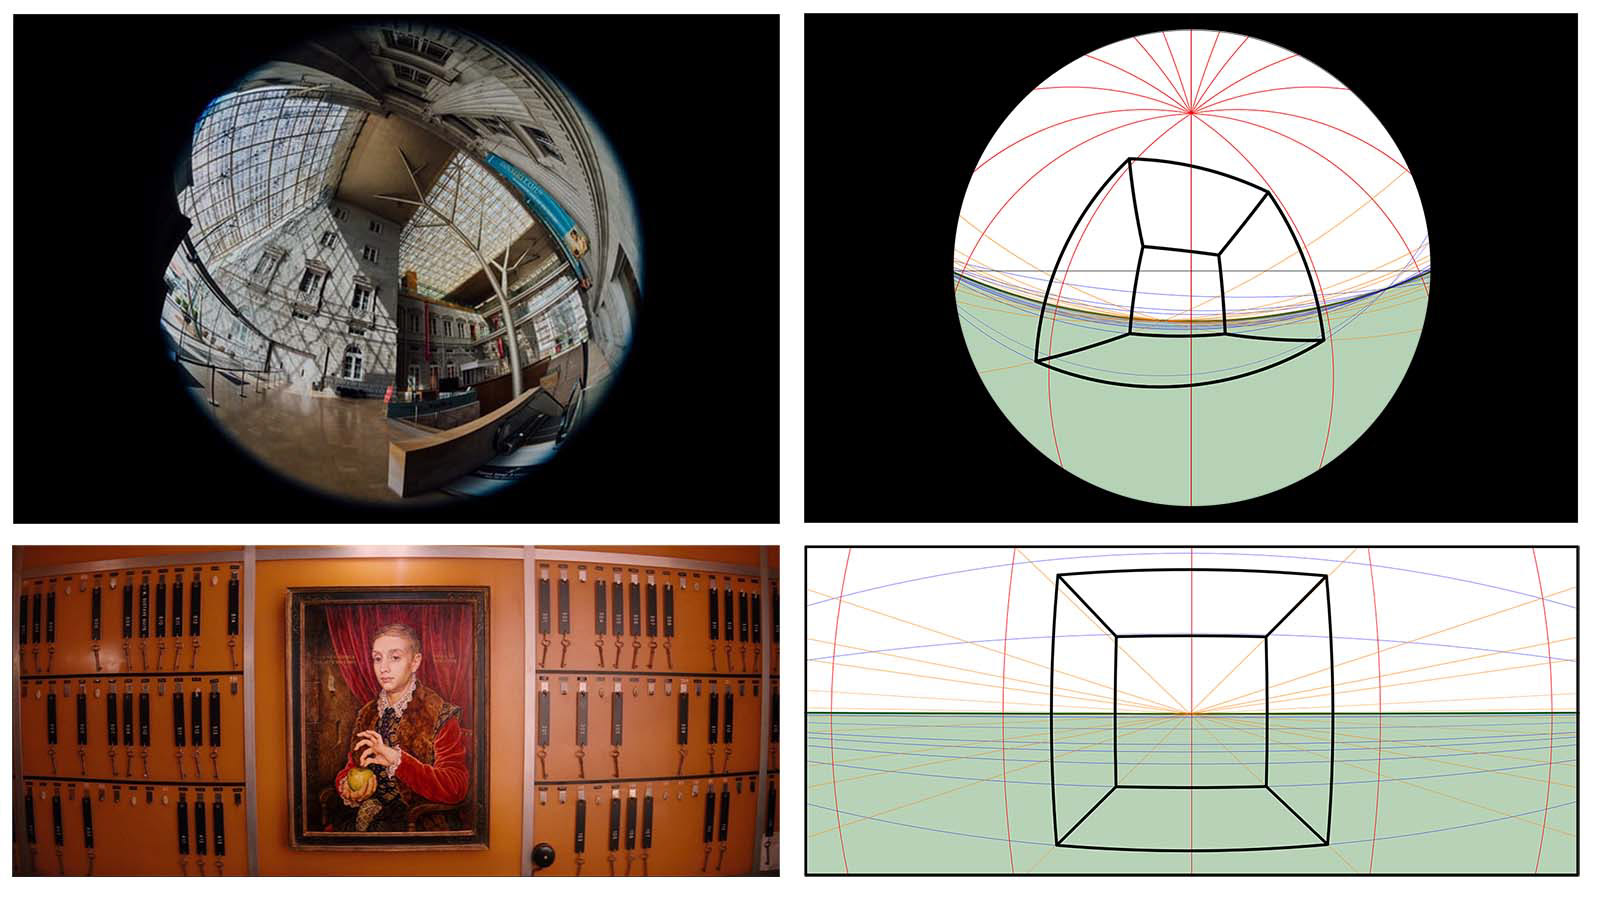
Examples of how circular perspective closely emulates different lenses from fisheye to the more conventional.
Don't be fooled however! The curvature of the horizon line should not be mistaken for the curvature of the earth. While it appears curved, it still represents an infinite flat plane. The bending of the horizon and all other lines exists purely to emulate the distortion caused by the curvature of the lens of our eye or that of a camera.
But let's get back to where we started, the failure of linear perspective to follow the first rule of perspective, that when things get further away from us they get smaller. With the addition of extra vanishing points and the use of circles we have given lines the ability to converge in two different directions. This means that the wall we were looking at before can now diminish in size to both the left and the right as it gets further away from us in each direction. Circular Perspective has done it! It has succeeded where linear perspective failed! The rules of perspective are respected once again and balance is restored! Death to linear perspective! All hail the new king, Circular Perspective!
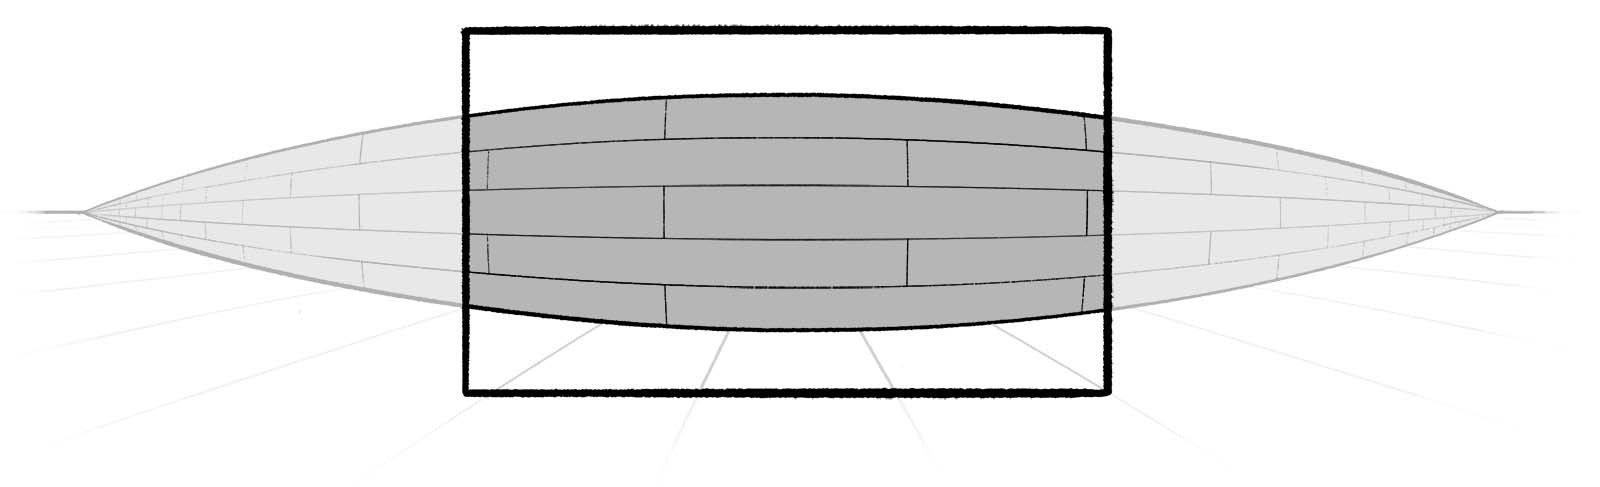
The Wall, once a straight lined abomination, now seen accurately diminishing to both the left and right vanishing points.